

Before you begin
- An endpoint URL that can receive POST requests
- At least one Target List created (contacts or companies can be added later)
- Admin or Marketer access to your 1eyeᴬᴵ workspace
Configure the destination
Unlike HubSpot, Salesforce, and Slack, Webhooks doesn’t use a login step — you configure it directly at the Destination node. Step 1: Open the Destination node If the webhook isn’t configured yet, the destination shows as Not Connected until you enter an Endpoint URL and send a successful test event.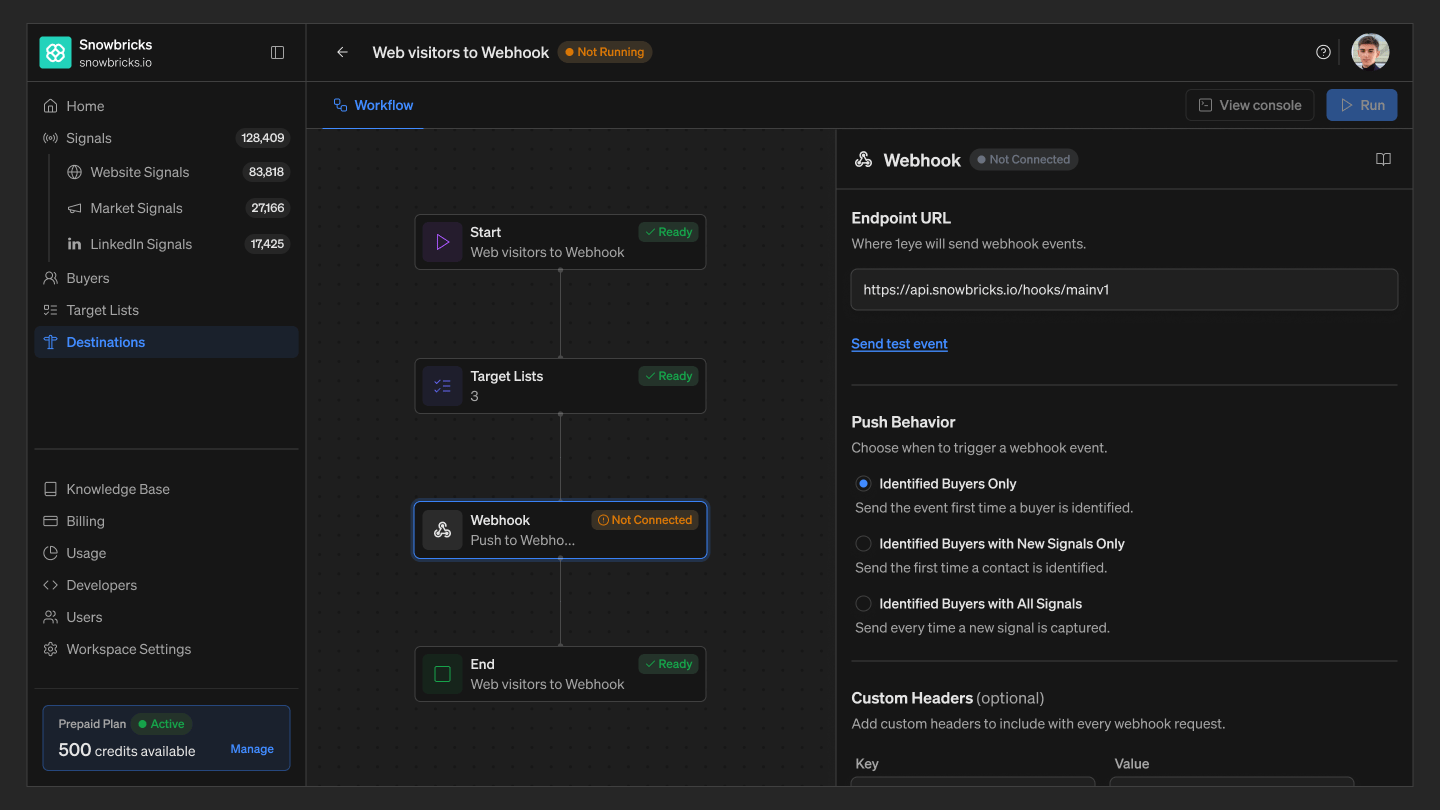
Step 3: Send a test event
Select Send test event to confirm your endpoint is reachable.
✓ Test event sent successfully
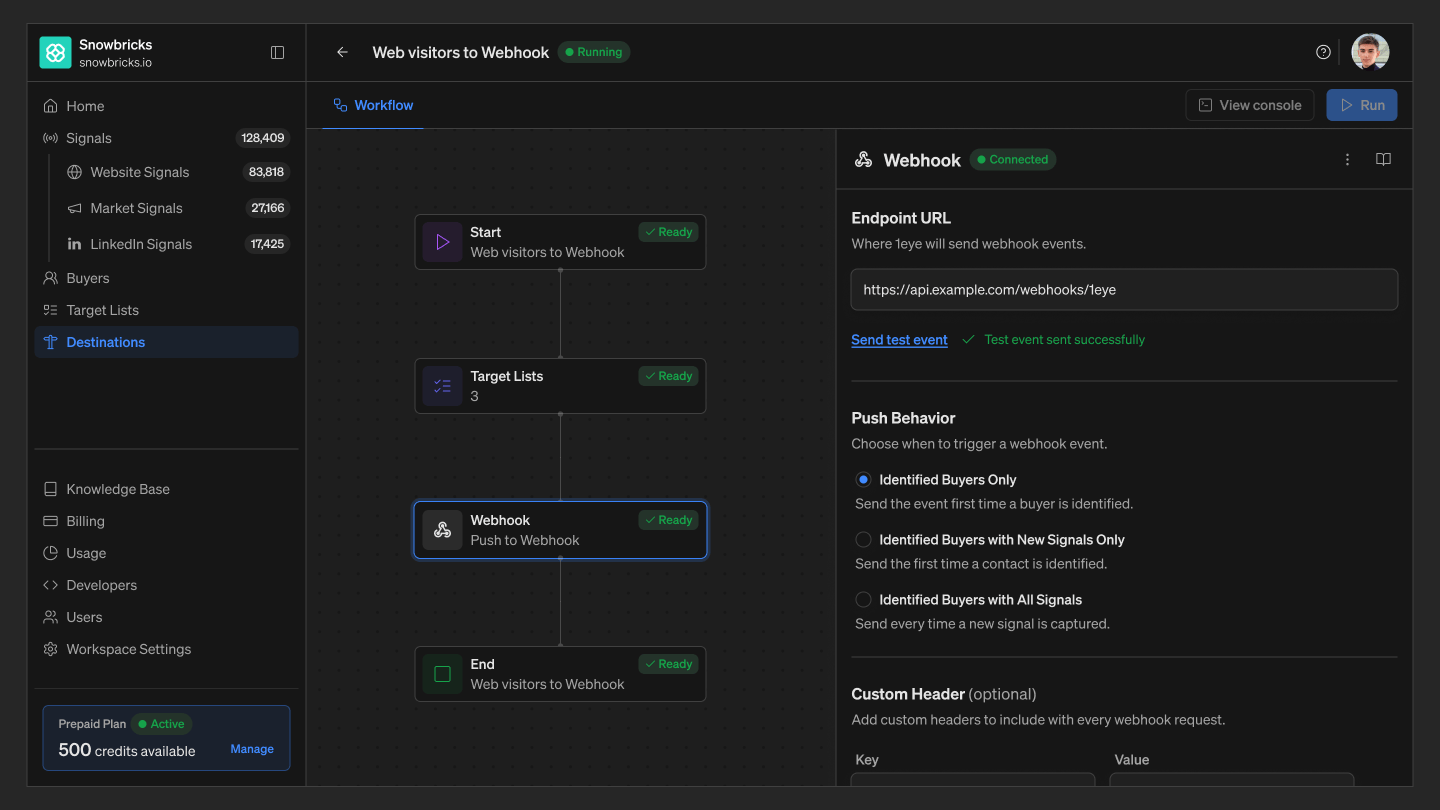
Step 5: Add Custom Headers (optional)
Add key/value headers to include with every request, such as a signing secret.
Select + Add More to add another header.
__.png?fit=max&auto=format&n=W-VDbmGNCju-BMqe&q=85&s=3aad8a392a0ef21a0e8860b483a116d1)
Webhook Payload
Monitor pushed records
From the Console, filter Webhook pushes by All / Pushed / Pending / Failed. Select a contact to see the exact payload sent to your endpoint.Stop Webhooks
- Open the workflow that uses Webhooks as a destination
- Select Stop (in place of Run) on the workflow
Best practices
Verify your endpoint before saving Use Send test event to confirm your endpoint responds correctly before turning the destination on. Use a signing secret Add a Custom Header like X-1eye-Signature so your endpoint can verify events actually came from 1eye. Match push behavior to your use case Use Once per Target Buyer for low-volume alerting, or Every Signal for full activity streaming. Watch the Console after changes After editing your endpoint or push behavior, check the Console to confirm events are landing as Pushed, not Failed.Troubleshooting
FAQ
Does Webhooks use OAuth like HubSpot or Salesforce?
Does Webhooks use OAuth like HubSpot or Salesforce?
No. Webhooks doesn’t require a login or authorization step — you configure it directly with an Endpoint URL and, optionally, Custom Headers.
What happens if I stop the workflow?
What happens if I stop the workflow?
All pushes to your endpoint stop until you run the workflow again. Events already sent to your endpoint remain there.
Can I send to more than one endpoint?
Can I send to more than one endpoint?
Each Webhooks destination sends to a single Endpoint URL. To send to multiple endpoints, add a separate destination for each one.